
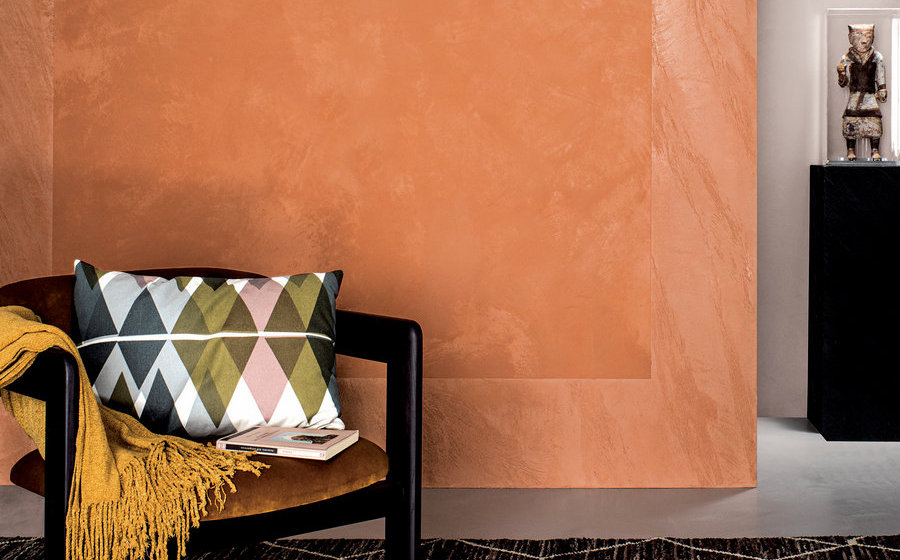
Multi-Layer Plaster Techniques: Building Depth and Dimension
Ready to Transform Your Walls?
Get samples, pricing, or connect with a certified applicator.
Introduction
The defining characteristic of premium venetian plaster is depth. Unlike paint—which sits as a flat film on the surface—plaster finishes reveal depth through multiple layers, subsurface light interaction, and careful color manipulation.
This depth is the technical distinction between competent plaster application and masterful execution. It separates work that looks like painted plaster from finishes that appear to be polished stone.
This guide is for applicators ready to elevate their craft: the advanced techniques, the science behind light interaction, the specific methods for creating specific effects, and the practice necessary to achieve professional control.
Why Multiple Layers Matter: The Physics of Depth
Paint is opaque. A single coat of paint covers completely; additional coats add only thickness, not visual depth. Plaster works differently.
Translucency and Light Refraction
Lime plaster, unlike paint, has slight translucency. Light doesn’t simply reflect off the surface; it penetrates slightly into the material, refracts through the crystalline structure, and reflects back out.
This is why marble and stone feel “alive”—light doesn’t just bounce; it seems to come from within.
Multiple layers of plaster interact with light in cumulative ways:
- First layer: Light penetrates, refracts, bounces back
- Second layer: Light partially penetrates, creating subsurface scattering
- Third layer: Cumulative refraction creates depth perception
The result: viewers perceive depth even though they’re looking at a flat wall. The wall appears to have interior volume.
The Subsurface Scattering Effect
This technical term describes what happens when light penetrates a translucent material:
- Light enters surface layer
- Travels through semi-opaque material
- Bounces off internal structures (lime crystals, pigment particles)
- Reflects back out at various angles
- Creates appearance of internal light
Marble and stone have this property naturally. Lime plaster achieves it through careful layer selection and color choice.
How applicators leverage this:
- Light layers on dark layers create perceived glow
- Dark layers on light layers create perceived depth
- Color variation between layers creates internal complexity
- Burnished surfaces enhance the effect through crystal alignment
Why Single-Coat Finishes Fail
Some applicators attempt to save time with single thick coats:
- Appearance: Flat, dull, paint-like
- Depth: None; surface appears two-dimensional
- Light interaction: Minimal; just surface reflection
- Professional perception: Obvious cost-cutting
Multiple thin layers are essential to premium appearance. This is why traditional plaster application uses 2–3 coat systems.
The Standard 2–3 Coat System: Each Layer Serves Purpose
Professional plaster installation uses a proven system where each coat serves specific functions:
First Coat (Base/Scratch Coat)
Purpose: Adhesion and substrate leveling
Characteristics:
- Thicker (2–4 mm)
- Coarser aggregate (grittier texture)
- Slightly different color (often lighter or less saturated)
- Lower burnishing (not polished)
Why this coat:
- Adheres firmly to substrate through mechanical interlocking
- Fills substrate imperfections
- Provides stable foundation for subsequent coats
- Substrate variation disappears in this layer
Application:
- Applied to prepped substrate
- Troweled rough (not smooth)
- Left to firm (3–7 days depending on humidity)
- Slightly scored or roughened before next coat (improves adhesion)
Second Coat (Body/Finish Coat 1)
Purpose: Building color and initial finish quality
Characteristics:
- Medium thickness (1–3 mm)
- Fine aggregate (smooth texture)
- Intended color (final design color)
- Moderate burnishing possible
Why this coat:
- Introduces final aesthetic (color, tone, general appearance)
- Provides base for dimensional effects through layering
- More visible than base coat but not final
- Allows color subtlety through layer interaction
Application:
- Applied 5–7 days after base coat cures
- Smoother trowel stroke than base
- Light burnishing shows texture variation
- Left firm before final coat
Third Coat (Final/Finish Coat 2)
Purpose: Depth, polish, and final aesthetic
Characteristics:
- Thin (0.5–2 mm)
- Fine aggregate (very smooth)
- Refined color (may differ slightly from second coat for dimensional effect)
- High burnishing (polished finish)
Why this coat:
- Creates depth effect through thin, polished layer
- Fine burnishing enhances light refraction
- Dimensional color (different pigmentation than coat 2) creates internal complexity
- Professional polish achieved here
Application:
- Applied 5–7 days after second coat
- Thin, careful application
- Heavy burnishing to hard, glossy finish
- Crystal alignment occurs during burnishing, enhancing light properties
Creating Specific Effects Through Layer Manipulation
Once you understand the purpose of each layer, creating specific aesthetic effects becomes intentional rather than accidental.
Two-Tone Technique (Color Layering)
Applying different colors in successive coats creates dimensional color effects:
Example: Warm base with cool overlay
Coat 1: Warm earth tone (ochre, burnt sienna) Coat 2: Same warm tone, slightly deeper Coat 3: Cool tone overlay (gray, blue-gray, or subtle cool earth)
Result: Viewers see the finish as cool-toned, but light interacts with warm undertones visible through translucency, creating perceived complexity and warmth beneath the cool surface.
Technique:
- Thin third coat so base color is visible through burnishing
- Burnishing compresses final color while allowing lower layers to show through
- Light angles show different color perception as burnish angles vary
Professional applications:
- Modern residential (sophisticated color complexity)
- Hospitality (inviting warmth with contemporary coolness)
- High-end retail (dimensional aesthetic)
Texture Variation Technique
Different burnishing intensities in successive coats create texture illusion:
Coat 1: Minimal burnishing (textured, matte) Coat 2: Moderate burnishing (semi-polished) Coat 3: Heavy burnishing (glossy polish)
Result: Surface appears to have complex, varied texture from matte to gloss, though it’s applied in single location. Light reflects differently from differently-polished areas, creating visual movement.
Technique:
- Apply each coat uniformly
- Vary burnishing intensity systematically (one area matte, one area semi-gloss, one area high-gloss)
- Blend transitions carefully so variation appears intentional, not accidental
- Lighting reveals texture variations
Professional applications:
- Feature walls (dramatic textural appeal)
- Residential accent areas
- Hospitality features
Embedded Materials Technique
Intentionally embedding materials (metallic dust, mica, glass beads) in intermediate coats creates special effects:
Examples:
Metallic finish:
- Coat 1: Base color (neutral)
- Coat 2: Base color + fine gold or bronze dust mixed in
- Coat 3: Thin clear plaster over metallic layer, burnished to reveal metallic glint
Mica sparkle:
- Coat 1: Base color
- Coat 2: Fine mica flakes mixed into plaster
- Coat 3: Thin clear finish coat, polished
Glass bead effect:
- Coat 1: Base color
- Coat 2: Plaster with fine glass beads pressed in before setting
- Coat 3: Thin finish coat
Result: Subtle sparkle or sheen revealed only under certain lighting angles, creating changeable appearance.
Technique:
- Add materials to pigmented plaster before application (not after)
- Apply coat per normal procedure
- Partially set (until firm, not fully hard)
- Polish the partially-set coat to burnish material into surface
- Allow full cure
- Apply final clear or light coat over top
Professional applications:
- Luxury residential
- Spas and hospitality
- Commercial feature walls
Relief and Textured Effects
Creating intentional surface relief (raised or recessed patterns) requires layering technique:
Technique for raised relief:
- Coat 1: Base color, applied and smoothed
- Coat 2: Apply base color, partially firm
- Create relief: Carve or trowel relief pattern into partially-firm coat 2
- Coat 3: Apply thin final color over carved relief
Result: Relief pattern visible through color layering; pattern catches light and shadow, creating three-dimensional illusion.
Technique for recessed relief:
- Coat 1: Base color, applied and smoothed
- Textured application: Apply coat 2 with textured trowel strokes, creating pattern
- Partial polish: Burnish high points while leaving recesses rough
- Coat 3: Very thin final color, allowing recessed areas to show base color through translucency
Professional applications:
- High-end residential (artistic finishes)
- Cultural institutions
- Specialty commercial projects
Cloud Effects and Artistic Blending
Creating organic, cloud-like color variation requires color blending between layers:
Technique:
- Coat 1: Base color (neutral ground)
- Coat 2: Apply primary color, then blend secondary color into partially-set surface, creating organic transitions
- Coat 3: Thin topcoat in very light, neutral color; applied and burnished to unify while revealing colors beneath
Application method:
- Apply coat 2 with primary color
- Before coat 2 firms fully, apply secondary color in brushed, organic strokes
- Blend colors with trowel using curved, flowing strokes
- Colors mix partially, creating gradations rather than stark transitions
- Burnish to integrate blending
Result: Organic, sky-like appearance; no two areas identical; appears naturally created, not painted.
Professional applications:
- Luxury residential (spa, bedroom, relaxation spaces)
- High-end hospitality (resort finishes)
- Artistic/cultural spaces
Light Interaction: The Key to Professional Appearance
The most sophisticated understanding an applicator can develop is how light interacts with layered plaster.
Direct vs. Indirect Light
Direct light (spotlight, sunshine) reveals:
- Surface polish intensity (glossy areas glow)
- Burnishing variations
- Relief texture and pattern
- Metallic or special effects
Indirect/ambient light reveals:
- Overall color and tone
- Depth and translucency
- Color variation between layers
- Dimensional effects
Professional implication: The finish must work under both conditions. Color choices for layer 3 must complement layer 2 under both direct and indirect light. This is why samples must be evaluated in project lighting, not showroom conditions.
Angle-Dependent Color Perception
Lime plaster finishes often show different colors at different angles (not color-shifting, but appearance variation due to light interaction):
- Head-on viewing: One perceived color/tone
- Acute angle viewing: Secondary color or tone visible through partial translucency
- Raking light (very acute angle): Burnishing pattern and relief become dominant
This is desirable—it creates liveliness. The finish appears to change subtly as viewers move around the room, which is perceived as premium and sophisticated.
Achieving Gloss vs. Matte Effects
The degree of burnishing directly controls apparent gloss:
Matte: Minimal burnishing; light scatters in all directions; surface appears non-reflective Satin: Moderate burnishing; slight sheen; directional light reflection visible Semi-gloss: Heavy burnishing; noticeable reflection; mirror-like at acute angles High-gloss: Extreme burnishing; near-mirror finish; significant light reflection
Blending gloss levels creates visual interest. A surface that’s semi-gloss overall with matte accents appears more sophisticated than uniform gloss.
Tools and Technique for Different Effects
Achieving specific effects requires understanding tools and their effects:
Trowel Selection
Broad, flat trowel (12–14 inches):
- For smooth, uniform application
- Creates flowing, directional strokes visible in burnish
- Best for general finish coats
Smaller, flexible trowel (4–6 inches):
- For detailed work and texture variation
- Allows hand control for blending and carving
- Best for relief effects and artistic work
Steel vs. stainless steel:
- Steel: Slightly higher drag; visible trowel marks
- Stainless: Lower drag; smoother, less marked surface
- Choice depends on desired surface quality
Trowel Angle and Pressure
Shallow angle (15–20°): Light pressure, surface-level smoothing Steeper angle (45°+): Heavy pressure, crystal compression, high polish
For layering effects:
- Coat 1: Shallow angle, light pressure (adhesion-focused, not polished)
- Coat 2: Medium angle, moderate pressure (building aesthetic)
- Coat 3: Steep angle, heavy pressure (maximizing polish and depth)
Burnishing Techniques
Single-directional burnishing: Trowel strokes in one direction; creates visible grain pattern (like wood)
Cross-hatching: Trowel strokes at angles; creates more unified appearance
Circular burnishing: Curved, flowing strokes; most natural, least visible pattern
No burnishing: Left as troweled, textured appearance
Partial burnishing: Some areas polished, some left rough (creates texture variation)
Water and Timing in Burnishing
Water use during burnishing is critical:
Too dry: Trowel skips and catches; leaves visible marks; doesn’t compress crystals effectively Optimal moisture: Slight dampness on trowel; allows crystal slipping and compression; smooth, glossy result Too wet: Plaster becomes paste; trowel glides without compressing; creates weak, soft surface
Timing:
- Too early: Plaster’s soft; trowel gouges; no crystal compression
- Optimal (partially set): Plaster is firm enough to compress but plastic enough to accept compression
- Too late: Plaster’s hard; trowel can’t compress; skips and doesn’t compress effectively
Professional applicators develop a feel for the optimal timing, which varies with:
- Humidity
- Temperature
- Plaster thickness
- Product formula
- Individual coat timing
Color Theory for Multi-Layer Application
Color selection for layering requires understanding how colors interact through translucency:
Complementary Color Pairs
Applying complementary colors in successive layers creates dynamic visual results:
Example: Warm orange base with cool blue-gray overlay
- Separate perception: Colors appear to vibrate
- Blended perception: Creates sophisticated neutral
- Under raking light: Primary color (orange) visible through translucency
- Under ambient light: Overall cool perception
Value Contrast (Light/Dark Layering)
Dark base, light overlay:
- Creates perceived depth and glow
- Light coat reveals dark layer through translucency
- Appears to glow from within
Light base, dark overlay:
- Creates perceived weight and sophistication
- Dark coat shows light undertones where burnishing is less intense
- Appears complex and multifaceted
Saturation Variation
Highly saturated base, desaturated overlay:
- Overlay appears sophisticated; base color shows vibrancy through translucency
- Result: Complex, not overly bold
Desaturated base, saturated accent:
- Base appears calm; accent color provides visual interest
- Result: Subtle with focal interest
Advanced Techniques for Experienced Applicators
Once foundational techniques are mastered, advanced approaches become possible:
Metallic Underlayers
Creating metallic finishes:
- Coat 1: Base color (neutral or complementary to metallic)
- Coat 2: Plaster mixed with fine metallic dust (gold, silver, bronze, copper)
- Polish coat 2: Burnish metallic coat to compress metallic particles and enhance reflectivity
- Coat 3: Transparent or very light plaster over metallic layer, burnished
Result: Metallic appearance with depth; metallics show through translucent topcoat; appears sophisticated, not garish
Professional skill required: Selecting metallic weight to avoid over-shiny appearance; blending coat 3 to enhance rather than obscure metallics
Mica and Sparkle Effects
Incorporating mica or fine glass particles:
- Coat 1: Base color
- Coat 2: Plaster with mica flakes; apply normally
- Burnish coat 2 carefully: Mica particles should be visible but integrated
- Coat 3: Clear or very light plaster over mica layer
Result: Subtle sparkle visible in direct light; not glittery; sophisticated sheen
Professional skill required: Mica particle size selection (too large = cheap-looking; too small = invisible); burnishing without disturbing mica particles
Dust-Coat Technique
Applying very thin final coat for color nuance without affecting gloss:
- Coat 1 & 2: Standard multi-coat application, burnished
- Dust coat: Ultra-thin final color (applied almost dry; barely visible)
- Burnish dust coat: Light final burnishing
Result: Color nuance from dust coat; base gloss from underlying coat 3; subtle appearance shift without heavy topcoat
Professional skill required: Extreme thickness control (1/32 inch or less); understanding how thin application affects perception
Relief and Carving Techniques
Creating intentional surface relief:
- Coat 1: Base applied and smoothed
- Coat 2: Applied to 2–3 mm thickness
- Carving (while partially firm): Use tools (trowels, brushes, specialized carving tools) to create relief pattern
- Burnishing selectively: Polish high points; leave recesses soft
- Coat 3: Applied over carved relief; shows topography through color and burnishing variation
Result: Three-dimensional surface with light interaction from relief; highly sophisticated appearance
Professional skill required: Artistic eye for composition; understanding how tools create pattern; managing cure time for carving window
Practice and Skill Development
Mastering these techniques requires deliberate practice:
Foundational Practice (First 50 hours)
- Focus: Consistent application, trowel technique, timing feel
- Exercise: Large flat panels with standard 2–3 coat application
- Measurement: Speed (professional pace: 100–150 sq ft/day), uniformity, polish quality
- Goal: Competent execution of standard techniques
Intermediate Practice (Next 100 hours)
- Focus: Color layering, burnishing variation, texture control
- Exercise: Multiple color samples; varying burnish intensity; two-tone effects
- Measurement: Color consistency, burnish uniformity, effect repeatability
- Goal: Artistic control; intentional effects rather than accidental variation
Advanced Practice (200+ hours)
- Focus: Complex effects, metallic work, relief techniques, artistic blending
- Exercise: Samples demonstrating all advanced techniques; small walls with challenging requirements
- Measurement: Professional quality; client satisfaction; timing and efficiency
- Goal: Mastery; ability to execute any technique on demand; artistic excellence
Giorgio Graesan Products for Advanced Techniques
Giorgio Graesan offers multiple product lines optimized for advanced application and sophisticated layering effects:
Marmorino 2020 (1090) — Standard Marmorino
- For classic 2–3 coat systems with standard burnishing
- Optimal for two-tone effects and traditional finishes
- Fine marble dust allows excellent color variation between layers and subsurface scattering
- Available in extensive color palette for layering flexibility
Spirito Libero (1060) — Design Stucco
- 2-coat system with clean, elegant aesthetic
- Excellent for contemporary multi-layer techniques
- Responds exceptionally well to burnishing for gloss variation effects
- Superior for metallic dust embedding and specialty effects
Istinto / Segui il Tuo Istinto (1070) — Specialty Textures
- Lime + marble + minerals formulation ideal for texture variation techniques
- Single-coat formulation but highly responsive to varying burnishing intensities
- Finishes available: Pietra Spaccata, Levigata, Vissuta, Zen, Bamboo, Cemento Naturale, Contemporanea
- Excellent foundation for relief and carved effects
- Superior for mica sparkle and embedded material techniques
Muro Naturale (1075) — Versatile Base
- Single-coat lime + marble + mica formulation
- Mica component ideal for dust-coat and sparkle applications
- Can be used as base for advanced multi-layer systems
Decorative Paint Lines (Gioia, Oro, Via Lattea, Euphoria, Others)
- Gioia — Silver mother-of-pearl, 169 colors. Advanced layering for metallic effects.
- Oro — Gold mother-of-pearl, 107 colors. Rich metallic applications.
- Via Lattea — Starry sky effect, 169 colors. Advanced particle embedding.
- Euphoria Silver (2110) / Euphoria Gold (2120) — Sparkling finishes for embedded sparkle techniques.
- Fili di Seta — Silk effect, 169 colors. For subtle shimmer and advanced textural work.
Custom Color Blending and Formulations
Giorgio Graesan provides:
- Compatible pigment systems across entire color palette
- Custom color mixing for specific layering requirements
- Color consistency guarantees across custom formulations
- Technical support for complex color layering from experienced craftspeople
Conclusion: Mastery Through Understanding
The depth and sophistication of premium plaster finishes result from understanding and controlling multiple technical factors:
- How light interacts with translucent, crystalline surfaces
- How color choice creates perception of complexity and quality
- How tool angle, pressure, and timing affect final aesthetic
- How multiple thin coats create effects single thick coats cannot achieve
Applicators who develop this understanding progress from technically competent to artistically excellent. Their work is recognizable, command premium pricing, and generate client loyalty through superior aesthetic quality.
Master the techniques. Control the light. Create the depth. Giorgio Graesan products provide the material platform; your skill and artistic eye create the results.
Build mastery through practice and understanding. Create finishes that reveal depth.